How to build a garage (or barn) backwards
1. Build the roof.
2. Then build the walls.
3. And have a crane put the roof on top
Houses, garages, and barns are built the same way: 1. you build the walls, then 2. lift up the rafters and nail them in place,
then 3. nail on the sheathing for the roof.
Problem is that step 2 takes 4-5 people and is dangerous. I did it all with just one person and it was safer. I just did it backwards.
I apologize for the small size of some of my photos. I lost my pc and files during the 2008 flood, so I only had these as a back up.


Problem is that step 2 takes 4-5 people and is dangerous. I did it all with just one person and it was safer. I just did it backwards.
I apologize for the small size of some of my photos. I lost my pc and files during the 2008 flood, so I only had these as a back up.
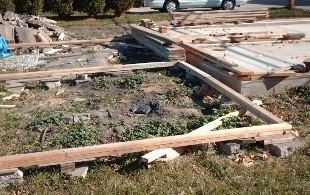
Step 1. Concrete floor
The very first task to do is frame up and pour the concrete walls and floor (or pad). This way you will have a nice flat, clean surface to construct your rafters.
The very first task to do is frame up and pour the concrete walls and floor (or pad). This way you will have a nice flat, clean surface to construct your rafters.
Step 2. Frame for roof
Then build a 2x4 frame on the ground. Its dimensions must be exactly the same dimensions of what the top of your walls will be. For me that was 23'6" wide and 22' deep. Don't put the frame too close to your garage floor. Leave at least 6 feet between them. I made the mistake of putting the frame ONLY 1 ft from the concrete floor, which made it tough to build the walls when the time came.
Then build a 2x4 frame on the ground. Its dimensions must be exactly the same dimensions of what the top of your walls will be. For me that was 23'6" wide and 22' deep. Don't put the frame too close to your garage floor. Leave at least 6 feet between them. I made the mistake of putting the frame ONLY 1 ft from the concrete floor, which made it tough to build the walls when the time came.
advertisement
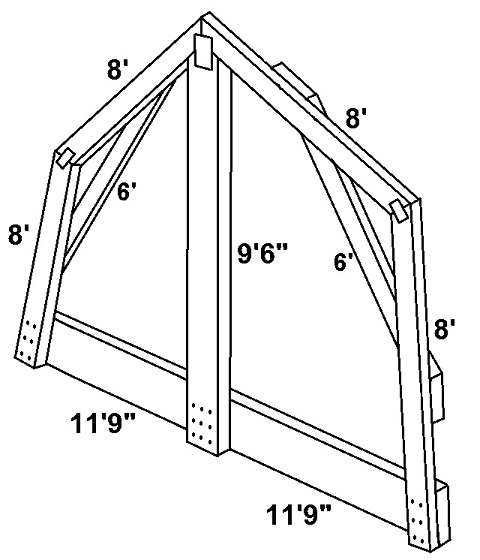
Step 3. Construct your own gambrel rafters.
Begin constructing your rafters (or buy them). Mine were made from: two (12 ft) 2x12, one (10 ft) 2x6, four (8 ft) 2x4, and two (6 ft) 2x4. The 2x12 were the floor of the roof, 2x6 was the wall down the center of the roof, the four 2x4s were the roof, and the two 6ft 2x4s were support.
Begin constructing your rafters (or buy them). Mine were made from: two (12 ft) 2x12, one (10 ft) 2x6, four (8 ft) 2x4, and two (6 ft) 2x4. The 2x12 were the floor of the roof, 2x6 was the wall down the center of the roof, the four 2x4s were the roof, and the two 6ft 2x4s were support.
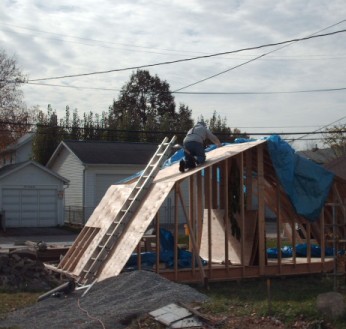
Step 4. Build the roof on the frame.
As the rafters are constructed a few at a time, stand them up on the frame and begin building the roof. Stand up 3 or 4 then affix the outer plywood roof sheathing. Then staple down your tar paper. Apply tarps as necessary to protect the roof from the weather.
As the rafters are constructed a few at a time, stand them up on the frame and begin building the roof. Stand up 3 or 4 then affix the outer plywood roof sheathing. Then staple down your tar paper. Apply tarps as necessary to protect the roof from the weather.
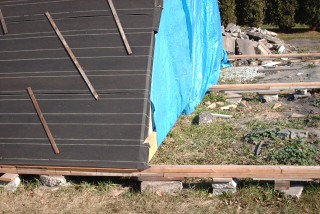
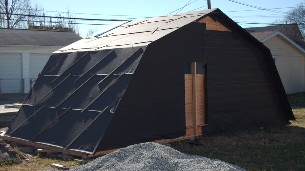
Here is my garage roof all done, sitting on its frame next to the concrete floor.
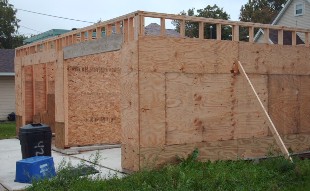
Step 5. Build the garage walls.
Get your 2x4s and plywood and build the walls of the garage. The dimesions of the top of the walls must exactly match the frame that was built on the ground, that the roof will sit upon.
Get your 2x4s and plywood and build the walls of the garage. The dimesions of the top of the walls must exactly match the frame that was built on the ground, that the roof will sit upon.
advertisement
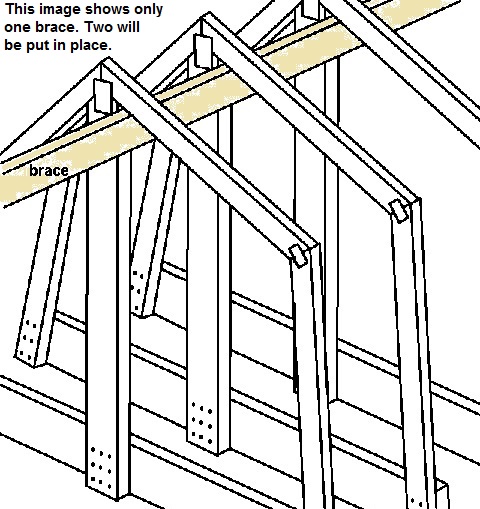
Step 6. Construct a brace for crane lifting
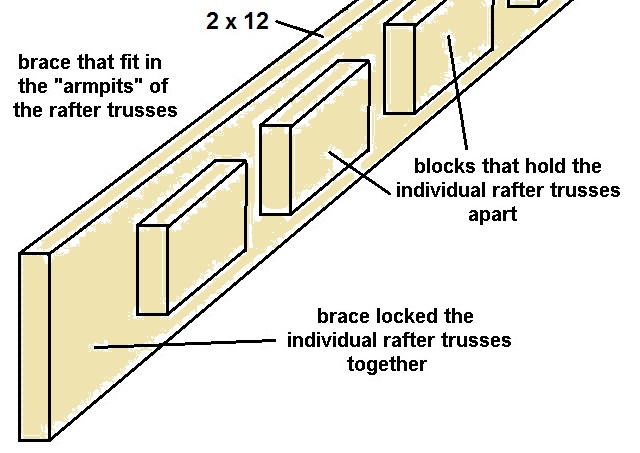
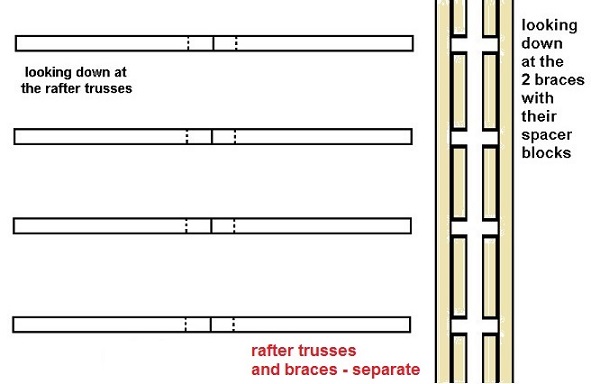
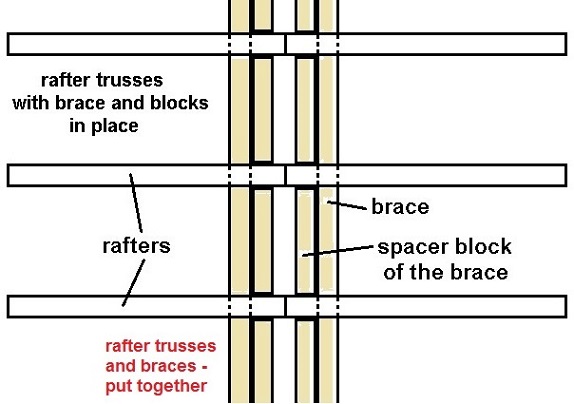
This might be the most complicated part. The crane needs a strong-sturdy-stiff roof member to grab ahold of. But there is nothing like that. The roof is all 2x4s and plywood. There is nothing that would support the entire roof's weight at only 4 contact points. So we construct a 2-piece backbone "BRACE" on the inside near the top of the roof.
This might be the most complicated part. The crane needs a strong-sturdy-stiff roof member to grab ahold of. But there is nothing like that. The roof is all 2x4s and plywood. There is nothing that would support the entire roof's weight at only 4 contact points. So we construct a 2-piece backbone "BRACE" on the inside near the top of the roof.
The brace is made of long 2x12s with 2x6 "block" spacers that are the width of the gap between the rafter trusses.
These block spacers keep the rafter trusses from sliding around on the braces.
Step 7. Affix the brace
Nail or screw the braces up in the armpits of the rafter trusses. I used duplex nails and screws so I could remove the braces after I was all done with the crane. You could leave it there, it is up to you.
Nail or screw the braces up in the armpits of the rafter trusses. I used duplex nails and screws so I could remove the braces after I was all done with the crane. You could leave it there, it is up to you.
advertisement
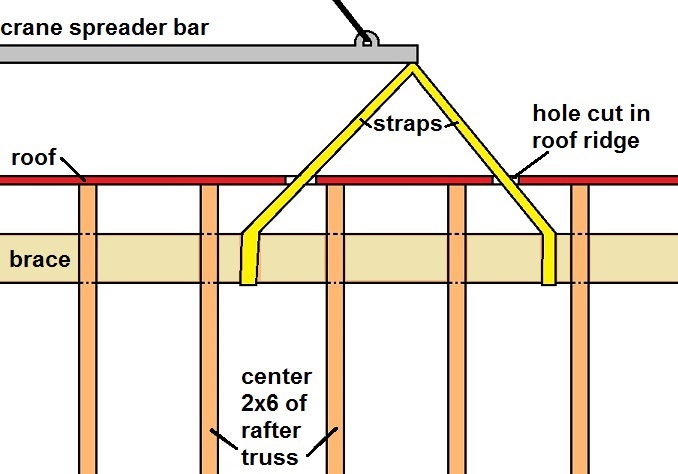
Step 8. Crane set up
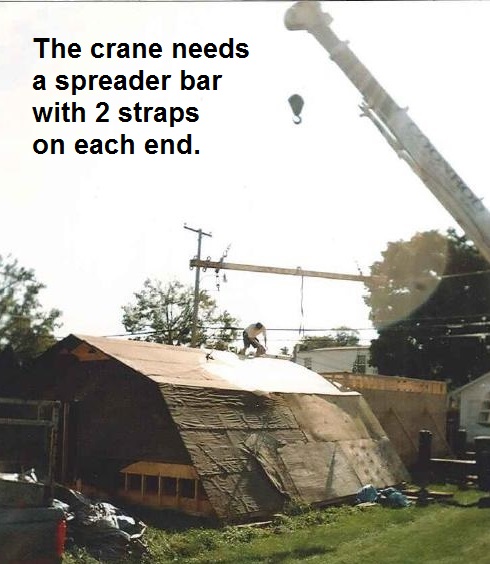
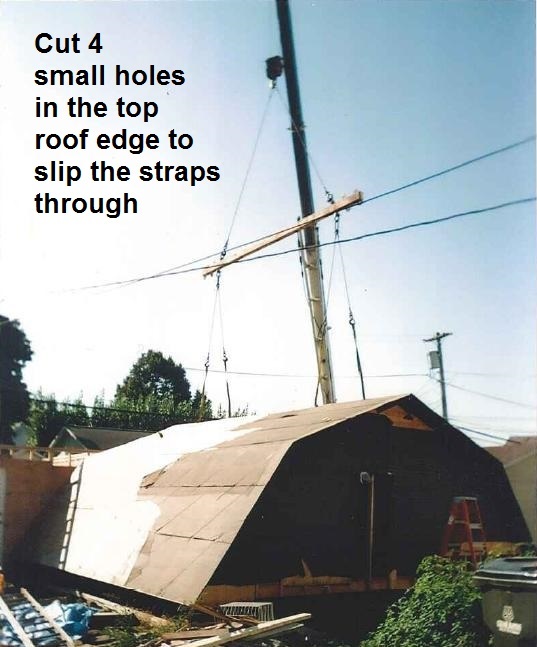
MAKE SURE the crane company sends a spreader bar with their crane. Then connect 2 straps to each end. Cut four 2"-3" holes in the top roof edge to allow the straps to make it down and wrap around the braces.
MAKE SURE the crane company sends a spreader bar with their crane. Then connect 2 straps to each end. Cut four 2"-3" holes in the top roof edge to allow the straps to make it down and wrap around the braces.
From this side view you can see how the straps come down through the holes in the top roof edge
and wrap around the braces.
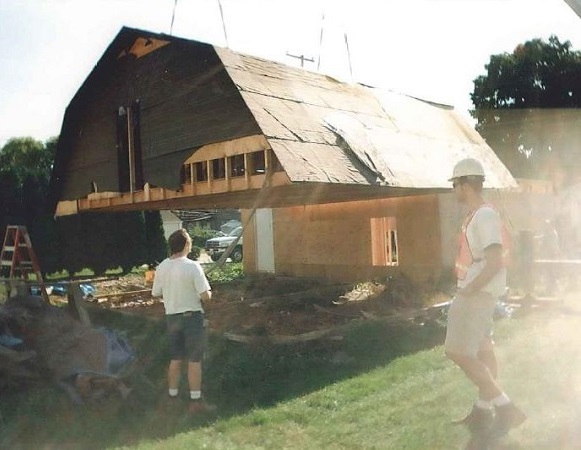
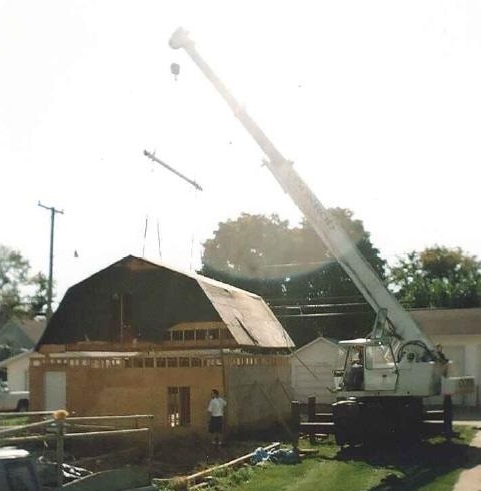
Step 9. Crane lifts the roof
The crane straps are connected to the brace, which is stiff enough to support the weight of the roof. Have the crane lift the roof a few feet, making sure it stays level. Then lift the roof over the top of your garage walls.
From my math calculations I determined that a double 2x12 brace would support a roof made of 2x4s and plywood. I did not shingle the roof because I felt the extra weight would exceed the strength of the 2x12s.
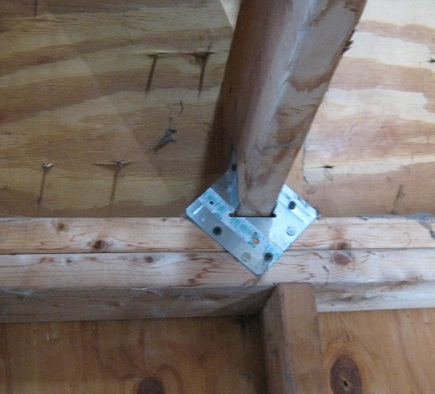
Step 10. Connect the roof to the walls
To connect the two:
1. I toe-nailed the rafters to the top of walls.
2. Then I added some metal rafter-tie plates. I think they sometimes call these hurricane clips.
3. I purposely left plywood off the top of the walls and the bottom of the wall-end of the roof. That way one piece of plywood will lap the walls and roof together.
advertisement
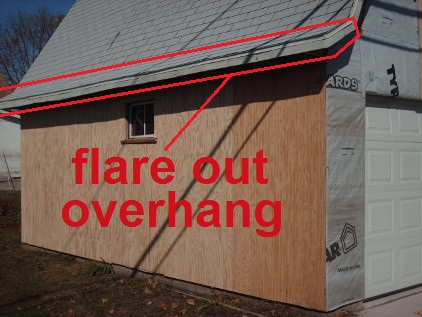
Step 11. Build flare outs
The roof I built stopped at the top of the walls, so there was no rafter tails for an overhang. This overhang, called a flare-out because it has an angle different from the rest of the roof, had to be added later.
The roof I built stopped at the top of the walls, so there was no rafter tails for an overhang. This overhang, called a flare-out because it has an angle different from the rest of the roof, had to be added later.
Using two short 2x4 pieces, I made supports for the roof flare out.
I had to make over 30 of these, because I put one opposite of every wall stud,
and toe-nailed through the two-piece support and through the wall and into the stud.
I know this does not look very sturdy, but they did not have to support alot of weight,
only 1 1/2 ft of roof.
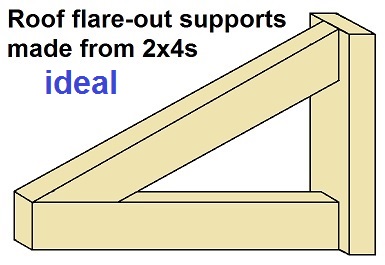
If I had to do it all over again, I would make the "ideal" 3-piece support like I have drawn up here.
So the left image shows what I did, and the right is what I wish I had made.
So the left image shows what I did, and the right is what I wish I had made.
Wrap it up
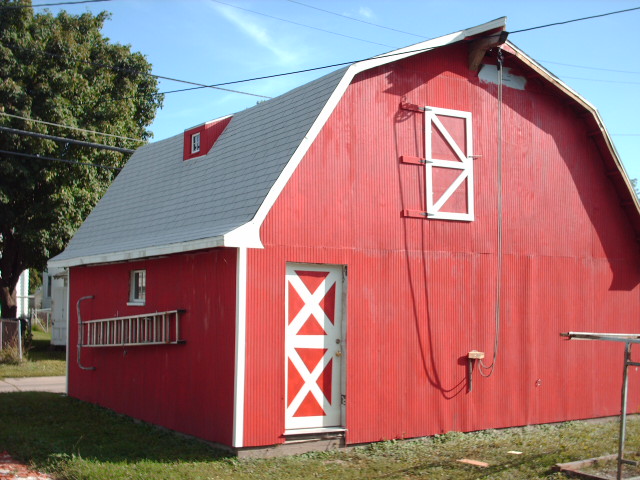
I roofed it with white 3-tab shingles. I nailed on some cheap car-siding paneling and painted it red.
Some extras I added were small flat shet dormers in the roof on each side. A 6x6 beam coming through the top to attach a pulley and rope. I use that rope and pulley all the time to lift stuff up to the door I added. On the inside I used 2x2s to make a ladder between two studs to create a ladder to get up to the roof/second level/hay loft.

 Back to Cal's Old House